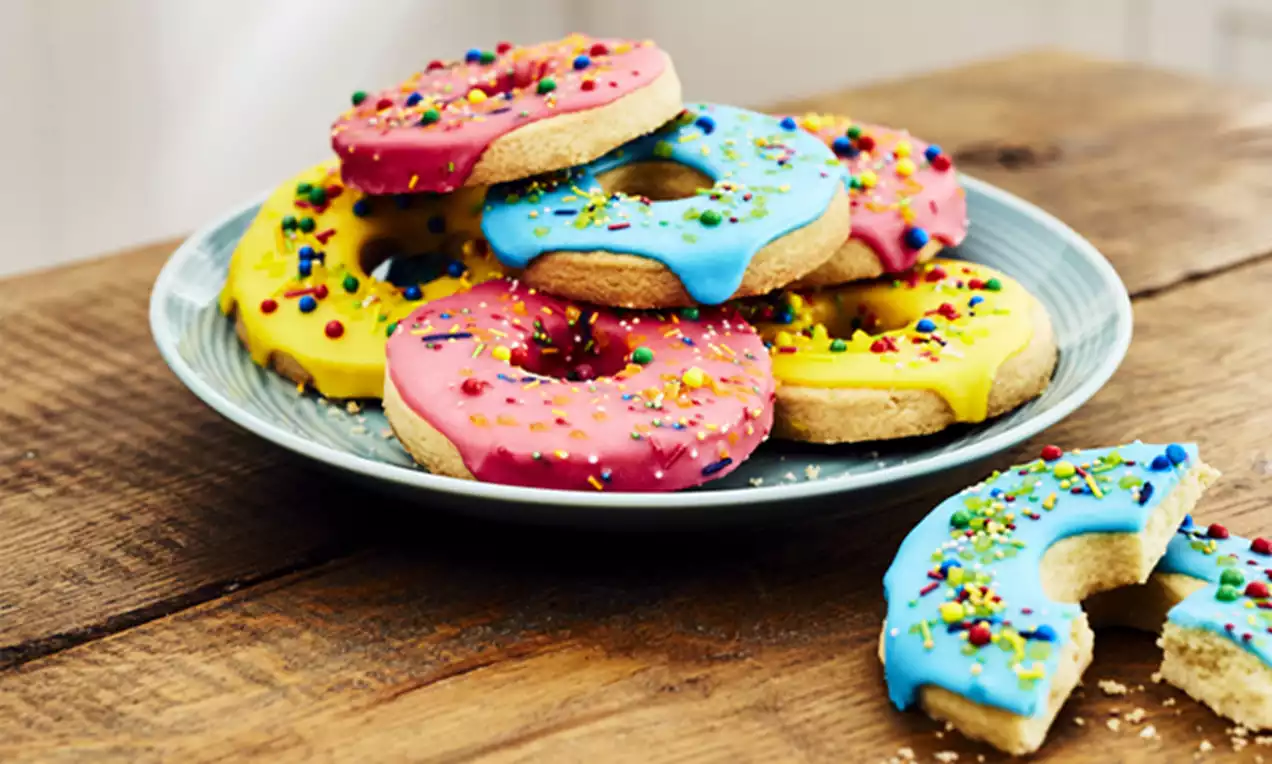
Easy Iced Doughnut Biscuits
Ingredients
Preparation:
First up, pre-heat your oven to 190C /170C / Gas Mark 5 and line a large baking tray with baking parchment.
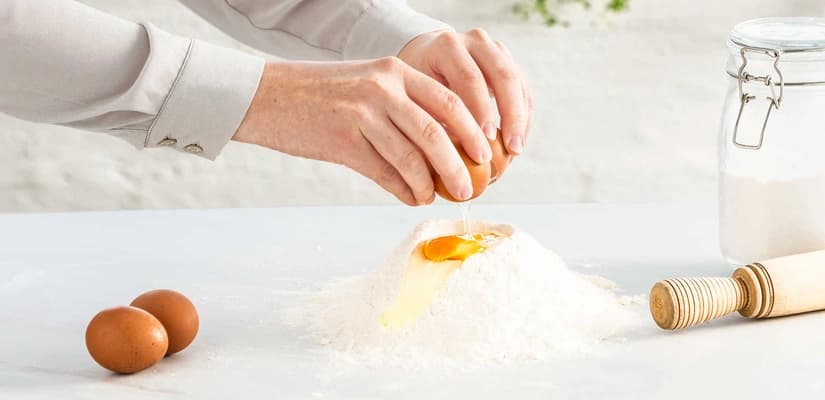
Grab yourself a bowl and beat the butter and sugar together until everything is all soft and creamy, then stir in the Dr. Oetker Madagascan Vanilla Extract and the flour. You’ll need to roll up your sleeves for this next bit, because it’s best to dive in with your hands to bring the mixture together into a soft ball of dough.
Cover your work surface with a light dusting of flour and gently knead out your ball of dough until smooth. Using a rolling pin, roll out your dough until its 1cm thick. Top tip: if you don’t have a ruler to hand, your average pen or pencil is roughly a centimetre wide
Now that you’ve got a nice thin sheet of dough, it’s time to grab your cutters and make your doughnut shape. Firstly, you’ll need to stamp out a round using a 7cm round cutter, then cut out a smaller inner circle using a 2cm cutter leaving you with a ring of dough that’s ready to become a doughnut biscuit. Repeat this to make 10 rings in total – you may need to re-roll the leftover dough in between so keep your ruler or pencil handy!
Pop the rings on the baking tray you lined earlier, spaced slightly apart, and pop in the fridge to chill for 30 mins. Once chilled, bake for 15 mins until they’re a lovely, light golden colour. Give them about 5 minutes to cool off a bit, then transfer to a wire rack to cool completely.
While the biscuits are cooling, grab yourself a bowl and mix together the icing sugar and 30ml water to form a thick glace icing. Don’t worry if it’s looking a bit too thick, you can add more water a little bit at a time to thin it down.
Now it’s time to get colourful! Divide the icing equally between three small bowls. Add a few drops of our pink colour gels into one of the bowls and mix thoroughly, adding more drops of pink until you achieve a bright pink colour that you’re happy with. You know the drill – repeat the same process for the blue and yellow colour gels. You can use any colour gels you want for your doughnuts and you can even leave one bowl with white icing to decorate if you want an extra colour!
Onto the best bit – decorating your doughnut biscuits! Grab yourself a teaspoon and spread the coloured glace icing onto each biscuit, so you’ve got some pink, some blue and some yellow doughnut biscuits. Don’t worry if it looks a little bit messy, that’s how we want it! Spread the icing to the edges and let it drip down the sides of the biscuits for a gloriously glazed effect.
You can’t have a glazed doughnut without sprinkles, right? For the final touches, scatter as many of our Bright & Bold Sprinkles over the top of the biscuits as you fancy. Leave for 5 mins to set completely, then dig in!
Related Recipes
White Choc & Cranberry Christmas Tree Flapjacks
Ultimate Rocky Road
Chocolate and Caramel Thumbprint Biscuits
Avocado Brownies
Easy Chocolate Danish
Edible Cookie Dough
Chocolate Orange Millionaire Shortbread