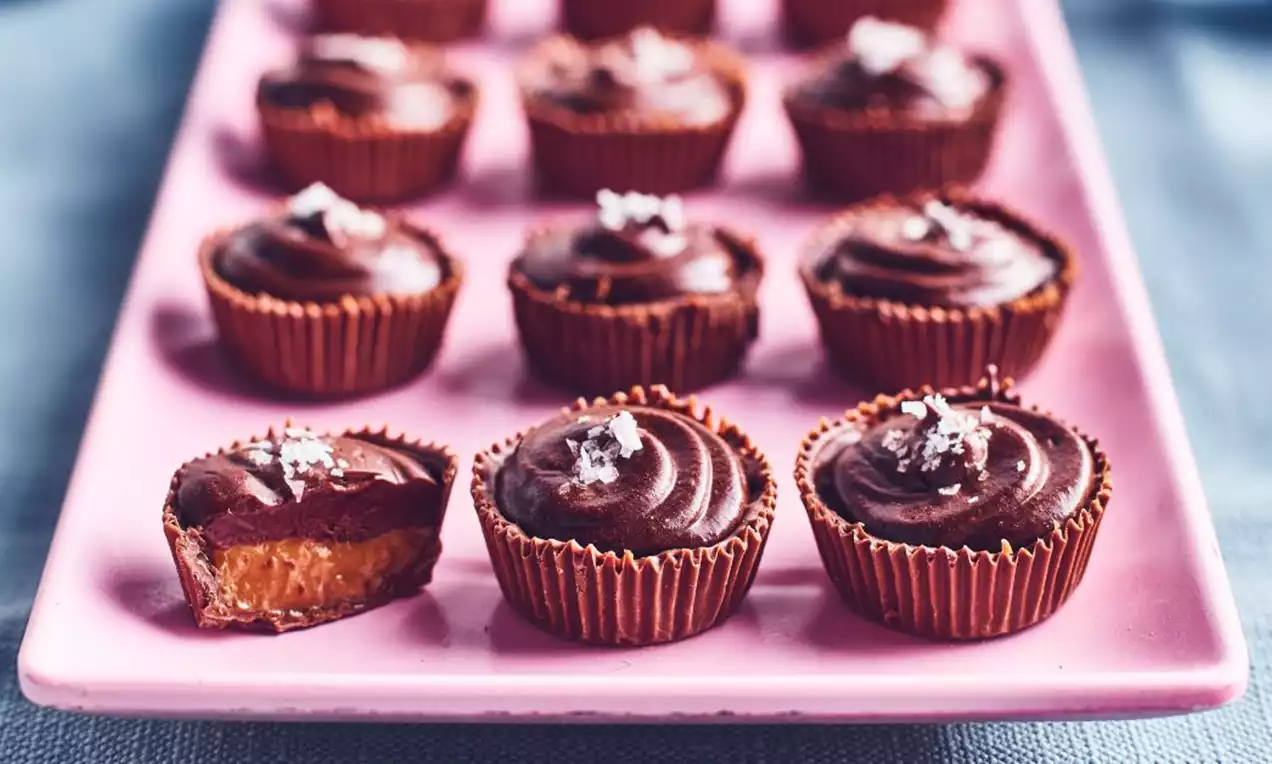
Salted Caramel Chocolate Cups
Ingredients
To temper Milk Chocolate, finely chop the chocolate into small pieces and put approx. two thirds (100g (3 ½ oz)) into a clean and dry heatproof glass or plastic (not metal) bowl. Quarter fill a larger bowl with cold water and set aside.
Put the bowl of chocolate over a saucepan of barely simmering water to melt slowly. Do not let the bottom of the bowl touch the water as the chocolate needs to melt gradually and not get too warm too quickly. Stir the chocolate occasionally using a plastic spoon or spatula. Once the chocolate is almost melted, put in a sweet making thermometer; or food probe. It is important to keep stirring the chocolate every now and then so that the temperature is consistent throughout the melt.
Once the chocolate has melted to 42°C (108°F) – after around 3 minutes, immediately remove
from the hot water and sit the bowl in the cold water for a few seconds to prevent the temperature rising any further. Note: if your chocolate does heatbeyond the desired temperature. It can still be used but it may look less shiny when set.
Remove from the water and wrap a tea towel round the bottom of the bowl to retain the heat. Add the remaining chopped chocolate and stir for a few minutes until the pieces melt. Remove
the tea towel and continue mixing the chocolate letting it cool to 30-31°C (86-88°F). This process may take up to 10 minutes depending on the kitchen air temperature.
Once the chocolate reaches the desired temperatureit is ready to use. Keep the chocolate over a bowl of warm water so it is still tempered and melted when you come to apply the second coat.
Preparation:
Break up 150g of the Milk Chocolate and place in a heatproof bowl over a saucepan of barely simmering water. Leave to melt then remove from the water, stir the chocolate and leave to cool for 5 minutes.
Working on one case at a time, put a teaspoon of melted chocolate into the bottom of the Baking Case. Using a silicone pastry brush, paint the inside of each Baking Case with the melted chocolate to achieve a thin, even layer of chocolate, leaving the top 1/2cm (1/4inch) of the case unpainted – this makes the case easier to peel away. When all the cases are coated with chocolate, leave in a cool place until set.
Re-melt the chocolate if necessary, and repeat the chocolate painting as above to give each case a further layer of chocolate, making sure the inside of cases are completely covered. Leave the cases to set completely.
When you are ready to serve the chocolate cups, carefully peel away the paper Baking Cases and discard. Put the chocolate cups on a board or serving platter and put a spoonful of Salted Caramel into the bottom of each.
Break up the remaining Milk Chocolate along with the Extra Dark Chocolate and put in a bowl. Heat the cream in a saucepan over a low heat, until just boiling. Pour the heated cream over the chocolate and leave to stand for 1 minute, then stir until the chocolate has melted. Leave to cool and thicken to a spooning consistency. Place a spoonful of ganache over the top of the caramel layer. Your caramel cups are now ready to enjoy!
Related Recipes
Blueberry Cheesecake in a Glass
Classic Yule Log
Lemon Meringue Pie
Gin and Tonic Jelly
Mixed Berry Eton Mess Tart
Salted Caramel Pie
Coconut, Chocolate and Mango Jellies